Today I want to take a look at how you can explore private HTTPS APIs. I’ll be using @culturedcode Things Cloud as an example: it’s the main engine behind keeping Things for iOS and Things for macOS in sync, and as there is no web version available it’s a little more tricky to take a peek behind the scenes.
First off some requirements: you need to be running macOS for this to work, and you need a Things 3 installation along with a thingscloud account.
Now all traffic between Things and Things cloud is exchanged via HTTPS, which means that all you can see is the DNS name the traffic is going to.
The first step should always be to hope for programming mistakes, like maybe the App is not validating the HTTPS certificate at all, or it’s not using certificate pinning. If this was the case one could use a regular proxy to peek at the traffic, like mitmproxy.
$ pip install "mitmproxy==0.18.2"
$ mitmproxy
$ sudo security add-trusted-cert -d -r trustRoot -k /Library/Keychains/System.keychain ~/.mitmproxy/mitmproxy-ca-cert.pem
Now configure your system to route HTTPS traffic through your local proxy:
sudo networksetup -setsecurewebproxy "Wi-Fi" 127.0.0.1 8080
sudo networksetup -setsecurewebproxystate "Wi-Fi" on
Opening Things however won’t result in any network calls. Luckily culturedcode did a fine job
ensuring Things doesn’t just talk to anybody. As we don’t have the real private key to decrypt
the traffic we’re done here, right?
Wrong.
One can actually instruct the OS to dynamically load a library at start, using DYLD_INSERT_LIBRARIES, and overwrite the method calls executed when validating SSL certificates.
man dyld says:
DYLD_INSERT_LIBRARIES.
This is a colon separated list of dynamic libraries to load before the ones specified in the program. This lets you test new modules of existing dynamic shared libraries that are used in flat-names- pace images by loading a temporary dynamic shared library with just the new modules.
At Blackhot 2012 this approach was first demoed - known as SSL Kill Switch 2. This allows us to disable the SSL verification in place.
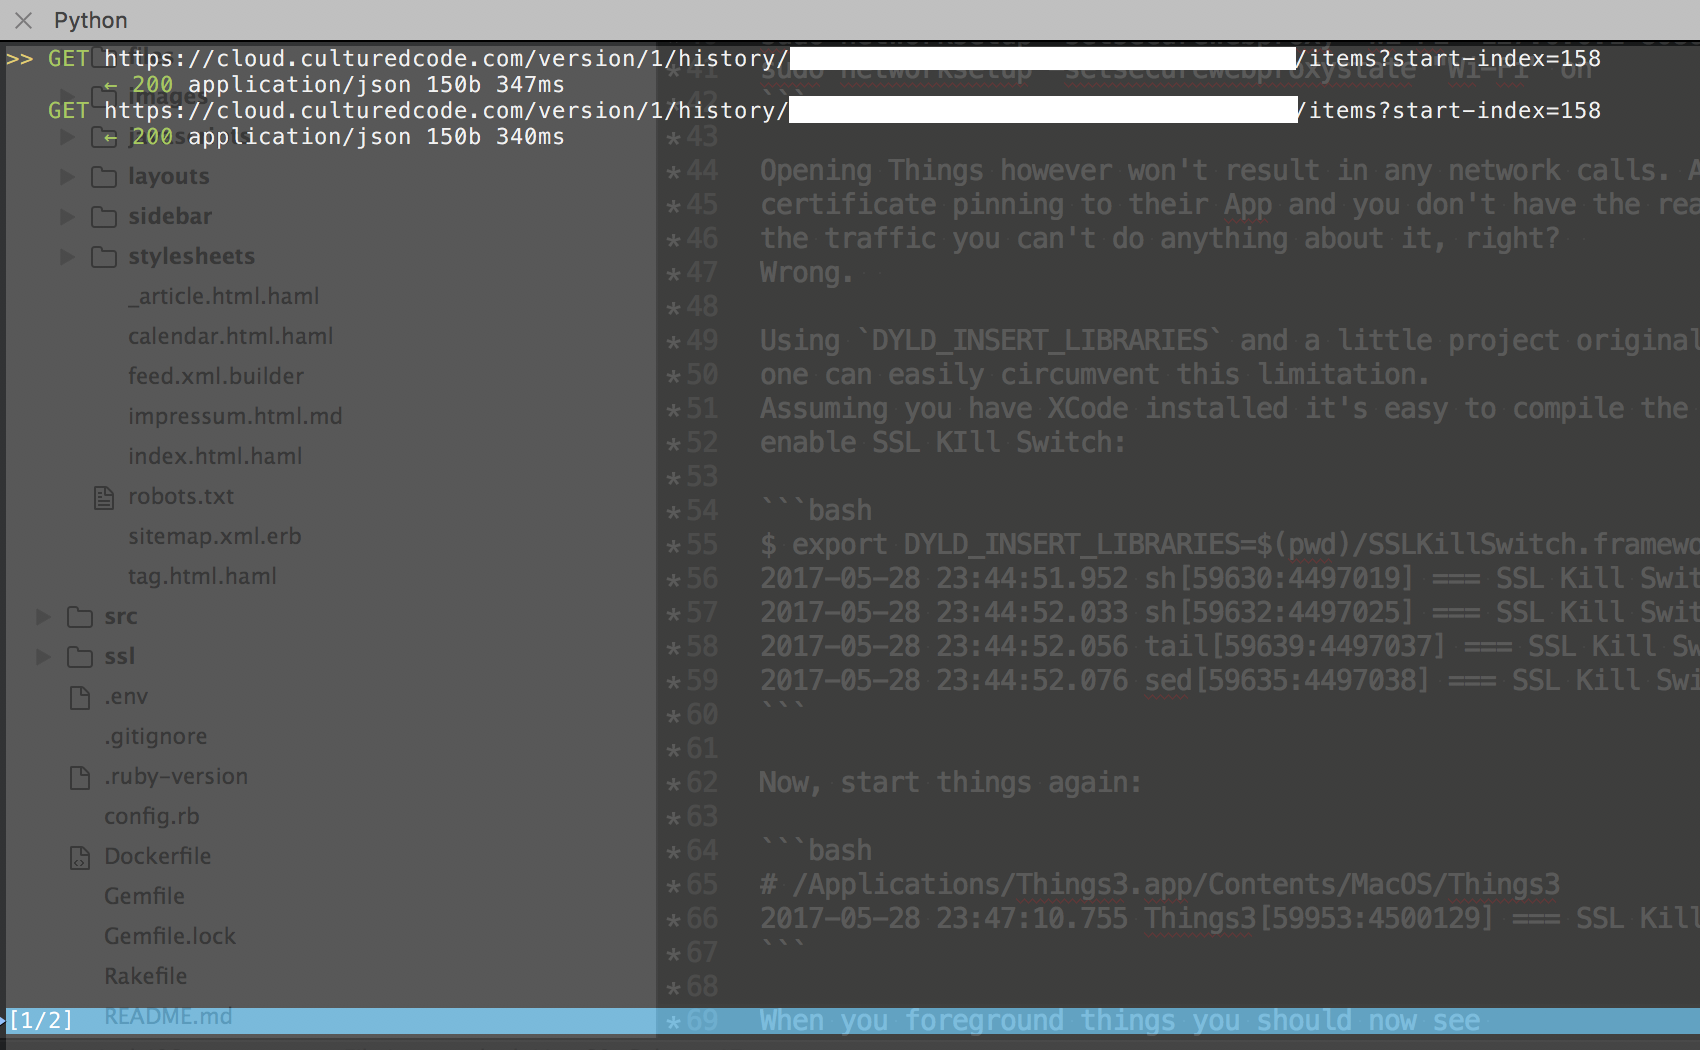
Assuming you have XCode installed it’s easy to compile the dylib yourself. Once you’re finished you need to first enable SSL KIll Switch:
$ export DYLD_INSERT_LIBRARIES=$(pwd)/SSLKillSwitch.framework/Versions/A/SSLKillSwitch
2017-05-28 23:44:51.952 sh[59630:4497019] === SSL Kill Switch 2: Fishhook hook enabled.
2017-05-28 23:44:52.033 sh[59632:4497025] === SSL Kill Switch 2: Fishhook hook enabled.
2017-05-28 23:44:52.056 tail[59639:4497037] === SSL Kill Switch 2: Fishhook hook enabled.
2017-05-28 23:44:52.076 sed[59635:4497038] === SSL Kill Switch 2: Fishhook hook enabled.
Now, start Things again:
# /Applications/Things3.app/Contents/MacOS/Things3
2017-05-28 23:47:10.755 Things3[59953:4500129] === SSL Kill Switch 2: Fishhook hook enabled.
When you foreground Things you should see API requests in your proxy:
Now all that’s left is to use Things, watch which API calls are being made when, and start inferring how the API actually works. As you can see peeking behind HTTPS APIs used by native application is actually very easy.
The results of me playing around with Things are available on Github: things-cloud-sdk. It’s a basic SDK which allows you to read and write to thingscloud; the most work was actually spent guessing what the cryptic payload names are.
I hope this helps the next time you want to peek behind the scenes of a native app & private HTTPS api. Until then - happy hacking!